Preface
Recently, I reinstalled the server OS in our laboratory, and decided to manage the server usage methods so that my colleagues can get better user experience on it. The article will be divided into the following three parts.
Virtual Environment
I strongly advise using Anaconda to manage the virtual environment, so that your environment won’t be influenced by the others who share the same server with you. The steps are as follows.
- See the existing conda virtual environment and see whether there are similar virtual environment for your need
conda -env list
- Use the following code to create your own virtual environment. Use “-p” to specify the path, or it will be installed in the “$HOME/.conda/envs/env_name”; use “-n” to name your environment; use “–clone” to decide the virtual environment you want to clone from; use “–python” to specify the python version you want to use; you can also specify the package you need, such as pip and matplotlib
conda create -p /home/zhangzihao/env-name/
- Activate your environment. What should be noted is that if you specify the installation path, you should use the full path instead of your environment name.
conda activate env_name
- Install the package you need using the following command. If you installed pip during creation, you may also use pip to install the package
- Make sure to deactivate your environment if you don’t need to use it anymore.
conda deactivate
# to delete an environment, use:
conda env remove -n env_name
Remote Debugging
As for how to run your project on the server, I sincerly recommend using PyCharm “SSH Interpreter”. The configuration process are as follows.
1. Deployment Configuration
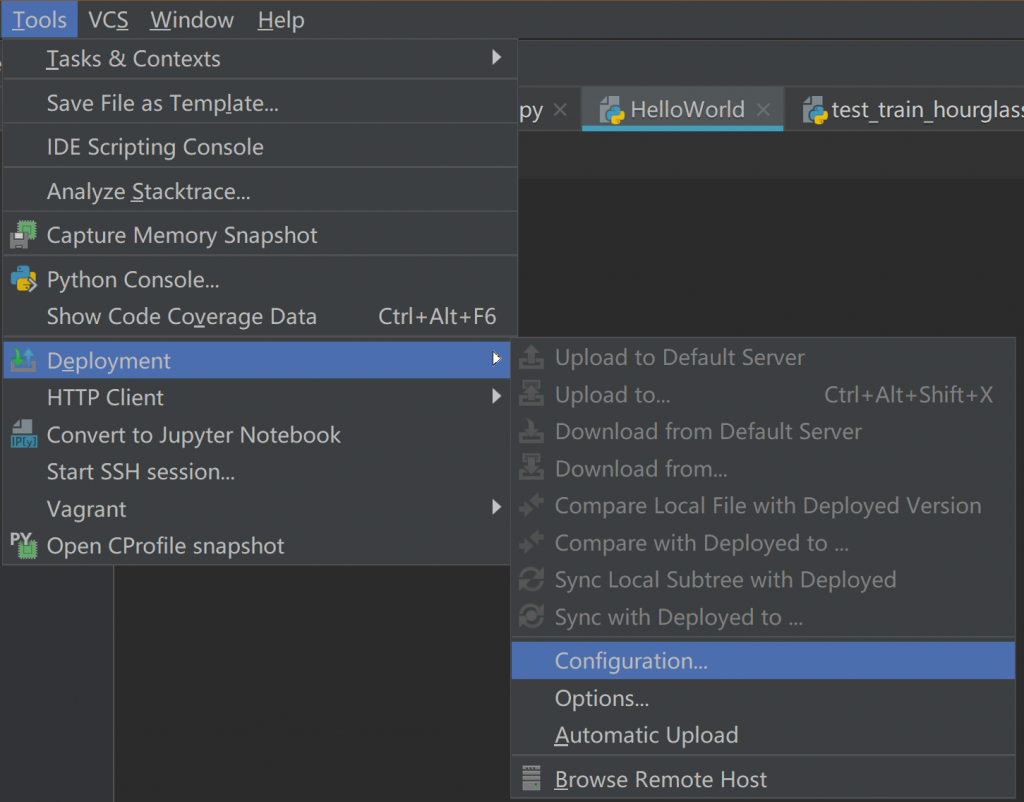
Tools->Deployment->Configuration, this step mainly setup the SFTP server for your Pycharm.
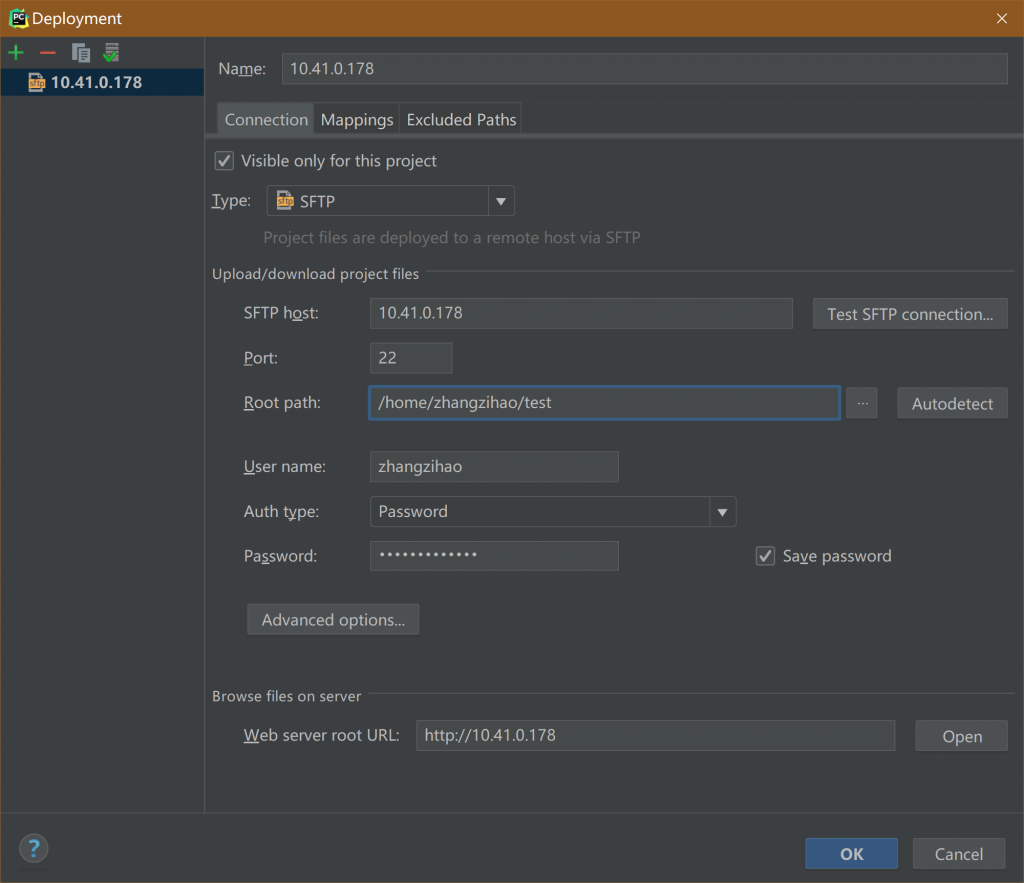
Add an new SFTP server, fill in the user name and password as well as the path where you want to save your project on the server. Here is an example. After this, you will be able to see the remote file catalog via Tools->Deployment->Browse Remote Host
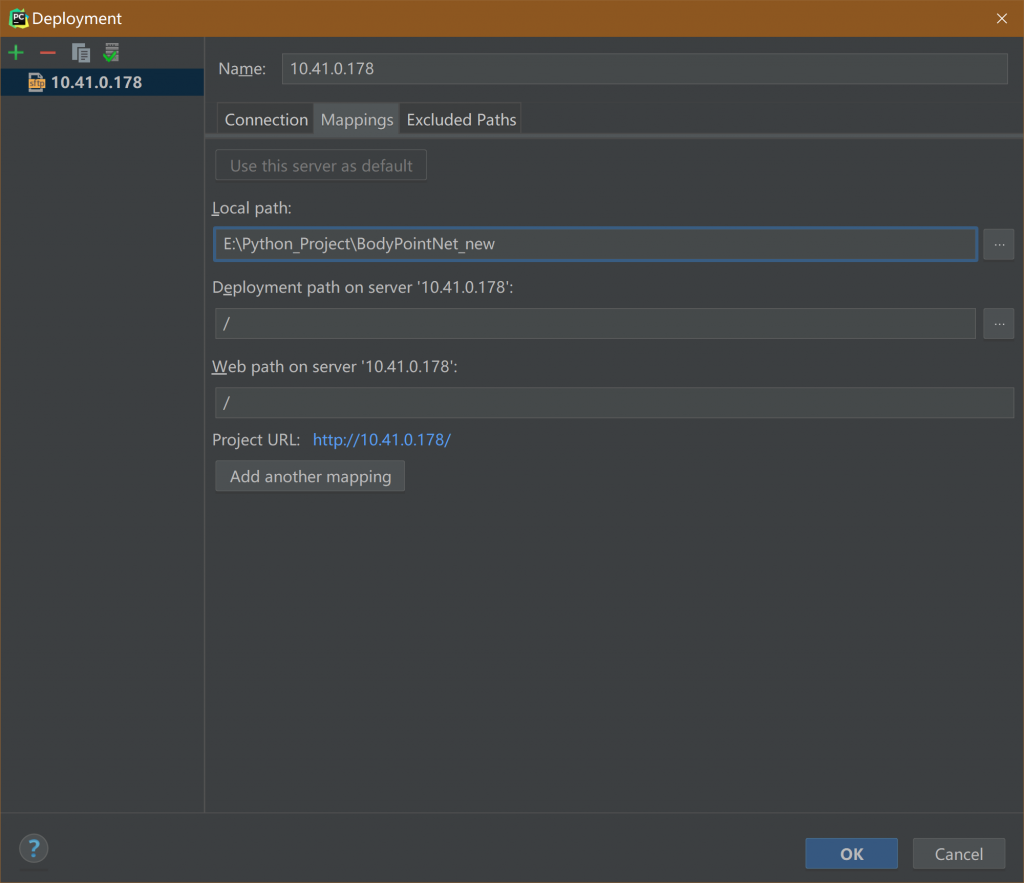
Then, set the mappings. This step helps you to map your local project to the server. The deployment path is the root path + current path, for example, in my configuration, it’s “/home/zhangzihao/test” + “/”
After that, the remote file catalog should turn green, then you can upload your project to the server via: Tools->Deployment->Upload to…
2. Remote Interpreter Configuration
First, choose to add a new project interpreter via: File->Settings->Project: your_project_name->Add

Choos “SSH Interpreter” and then select “Existing server configuration”, chose the deployment configuration you set in the previous step. Then, chose “Move this server to IDE settings”.

Set the interpreter path and sync folders, then press next. What should be noted is that if you use a virtual environment, the interpreter path is under the path you set when you configure your virtual environment.

- Thanks to Lei Hu, we can also use frp to map the port 22 on the server to your frp server port, and add the remote interpreter from outer net.
Graphical interfaces
Here, I mainly refer to how to get the graphical interface remotely. All of our servers has installed XRDP and can be directly connected using Windows Remote Desktop. However, what if you just want to get a graphical result, such as cv2.imshow() if you are using PyCharm remote debugging? Xserver should be the answer.
Using Xserver can make you get a graphical result in the command line. The easiest way is to use MobaXterm. You can also use Xming + Xshell to get it.
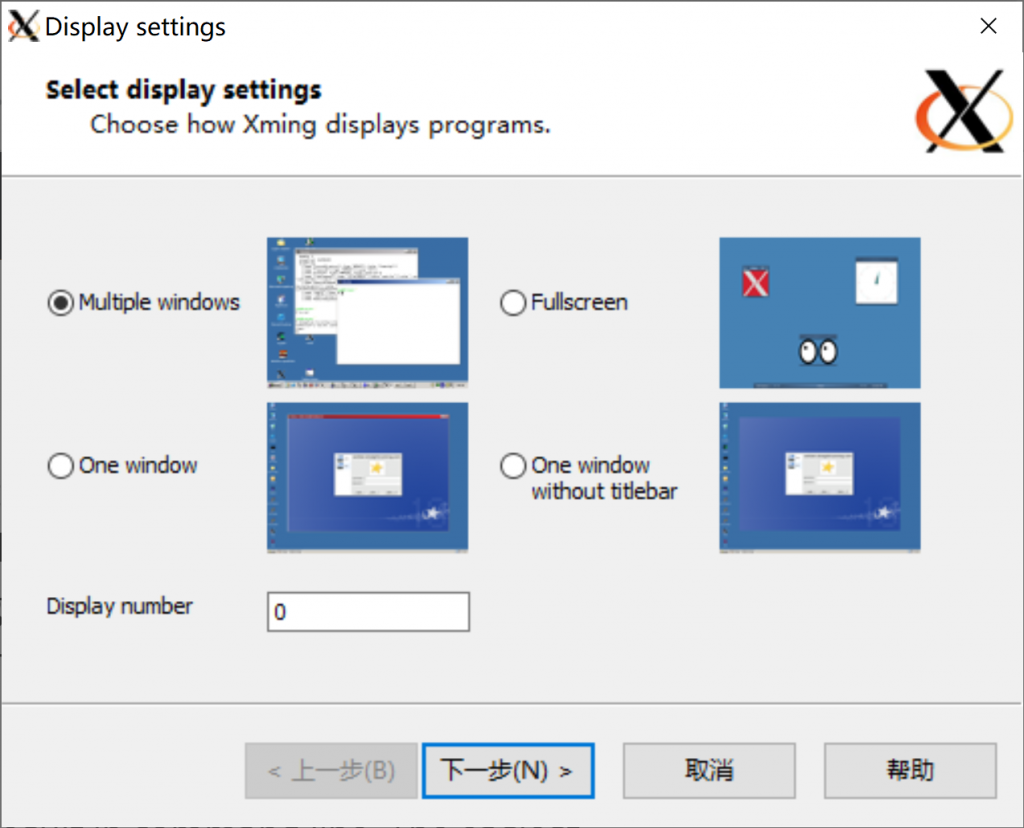
1. Xming Configuration
- Open XLaunch, set the display number and remember it.
- Next–> Start no client –>Clipbard–>Complete
- Modify the X0.hosts under the Xming installation path, add the IP address under the localhost line.
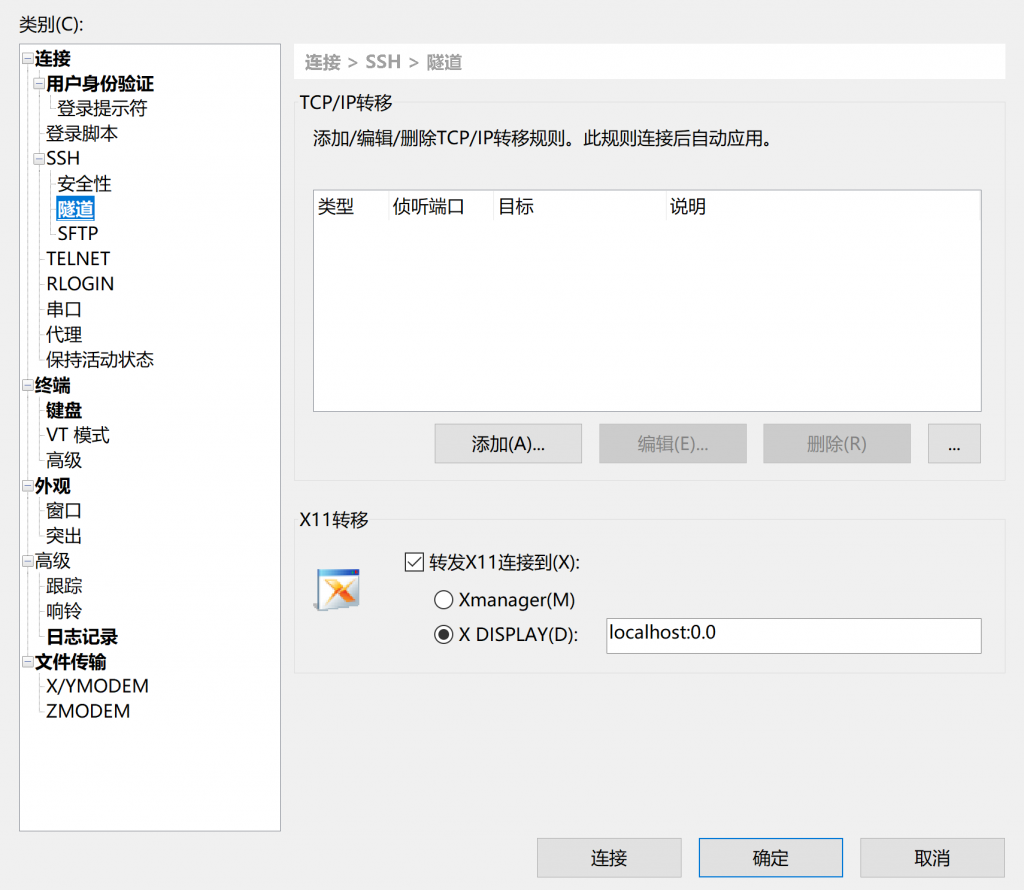
2. XShell Configuration
Follow the image below, in localhost:0.0, the first zero is your display number
3. PyCharm Configuration
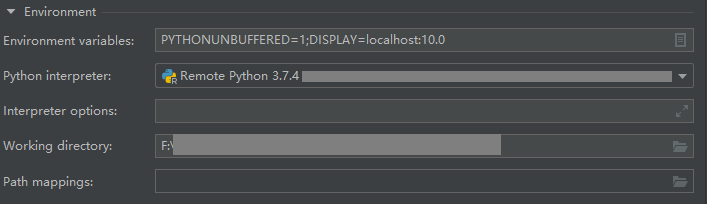
- run the command “echo $DISPLAY”, you will get a returned value: localhost XX.0
- add DISPLAY=XX.0 to the PyCharm Run/Debug Configurations Environment variable